
✓ Suitable
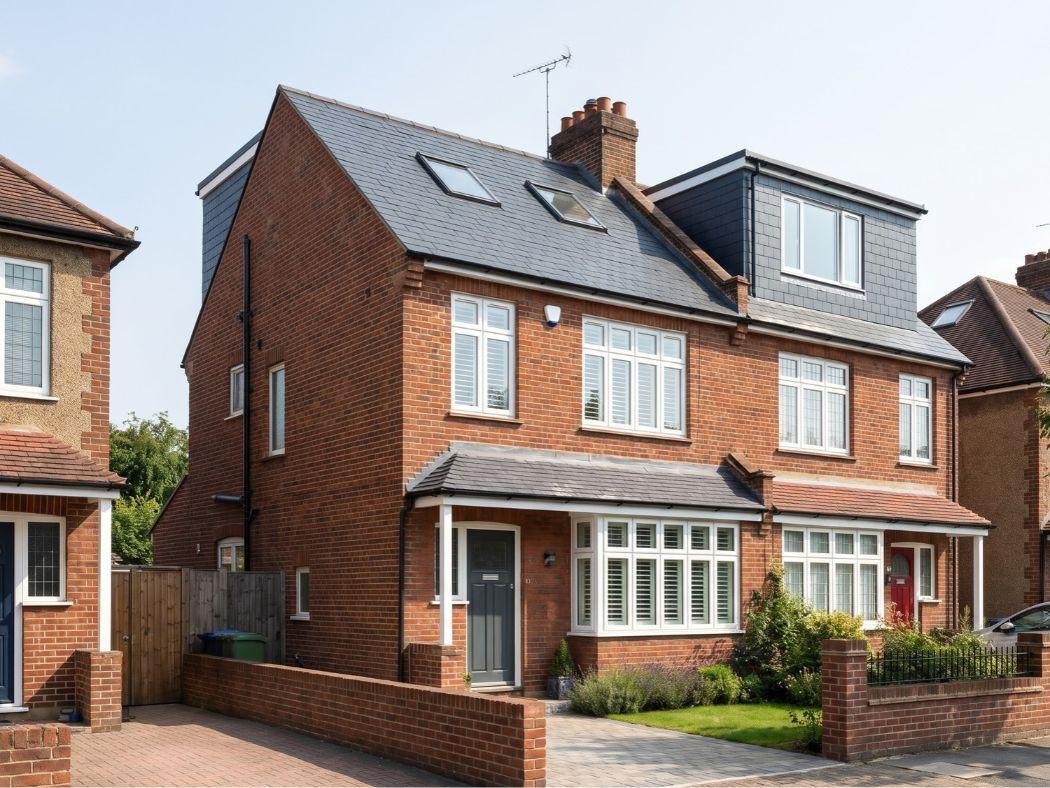
End-terrace
The exposed end wall makes this ideal. Often the most straightforward hip-to-gable.
Hip-to-Gable
Full-width loft rooms from £50,000, usually without planning permission
We rebuild the sloping triangular end of your hipped roof into a vertical gable wall, opening the full width of your loft. Combined with a rear dormer, it creates one of the biggest space gains possible under permitted development.
Fixed price from
£50,000 excl. VAT
See exactly what changes when the hip end is rebuilt.
The hipped end of your roof slopes down to eaves level on the side of the house — cutting into the usable width of your loft. We replace that slope with a straight vertical wall, giving you the full floor area of the loft to work with.
Roof Shape
Hipped roof — before conversion
The hip end wastes space. The sloping triangular end cuts into the width of the loft on both sides, forcing the staircase and rooms into a narrower footprint.
The conversion needs a hipped roof — one that slopes at the end rather than finishing in a straight vertical wall. Mid-terrace houses almost never have a hip end, but most semi-detached and end-terrace properties do.
✓ Suitable
The exposed end wall makes this ideal. Often the most straightforward hip-to-gable.
✓ Suitable
Convert the non-party-wall side. Very popular in South London and Surrey.
✓ Suitable
Either or both hips can be converted. Maximum space and planning flexibility.
✕ Not suitable
No hipped end — not possible. Consider a rear dormer or L-shaped dormer instead.
Not sure if your roof is hipped? Our surveyor checks this on the free site visit — along with ridge height, structural feasibility, and your PD volume allowance — before any design work begins.
Most of our hip-to-gable conversions are done at the same time as a rear dormer. The gable end opens the width, the dormer opens the height — and together they create a loft room the size of a generous master suite, usually under permitted development.
The gable opens the hip end so the staircase and rooms run the full width of the house rather than squeezed into a narrower section.
The rear dormer raises the back slope to a vertical wall, giving standing height across most of the floor.
A gable window faces the side garden or street, adding a third source of natural light alongside the rear dormer windows and rooflights.
Combining both under one contract and one build programme saves on scaffold time, project management, and disruptive phases.
Combined fixed price from £65,000
Hip-to-gable and rear dormer done as one project, one contract, one programme on site. Steel, structure, insulation, stair, electrics and building regs sign-off all included.
Get a combined quotePrice Guide
What moves the cost
Standalone hip-to-gable
Gable wall only, no dormer
£50,000
to £60,000
Hip-to-gable + rear dormer
The most common combination
£65,000
to £80,000
En-suite addition
Shower room in the loft
+£8,000
to +£14,000
Wider semi-detached
Longer steels, more materials
+£3,000
to +£8,000
Planning application
Conservation area, Article 4
+£3,500
to +£6,000
All prices excl. VAT. Every quote is fixed and itemised before you sign anything.
Try the cost estimatorHip-to-gable conversions fall under the same permitted development rules as rear dormers. Here are the conditions your project must meet to proceed without a planning application.
In a conservation area or flat?
Permitted development rights do not apply. We prepare and submit full planning applications for these cases — a well-designed hip-to-gable with matching materials is usually approved.
The conversion only works where the end of the roof slopes down to eaves level rather than finishing as a straight gable wall. If you are not sure, our surveyor will confirm on the free visit.
40m³ for an end-terrace, 50m³ for semi-detached and detached. If you have already extended the roof, any previous volume counts towards the same total.
The new gable wall must not be higher than the highest part of the existing ridge. In practice a hip-to-gable almost never raises the ridge, so this is rarely an issue.
The new gable wall must be finished in materials similar in appearance to the existing house. Brick or rendered blockwork to match the walls is the standard approach.
On a semi-detached house, any windows on the new gable wall must be obscure-glazed and non-opening — or placed more than 1.7m above floor level — to protect neighbours' privacy.
If the hipped end faces the front of the house (a corner plot, for example), it may count as a principal elevation and fall outside permitted development. We check this before design begins.
If your project qualifies as permitted development, we still recommend applying for a Lawful Development Certificate — the council's written confirmation that your solicitor will ask for when you sell.
The critical phase is weeks three and four, when the hip end is rebuilt and (if combined) the rear slope opens. Everything before it is preparation. Everything after is working inside.
Week 1
Scaffold and protection
Scaffolding goes up at the hip end and rear with a loading platform at roof level. The loft is cleared and sheeting is in place for the day the hip is opened.
Week 2
Steel beams in
Structural steels are set onto padstones in the party walls or gable and carry the new loft floor above. The steels are lifted through the roof to avoid disrupting the house below.
Weeks 3–4
Hip end rebuilt
The sloping hip is stripped and the new gable wall goes up — typically blockwork to match the house. Simultaneously (if combined) the rear slope is opened for the dormer frame.
Weeks 4–5
Weathertight
New roof slopes are tiled or slated to match, windows are fitted in the gable and dormer, and the flat roof deck goes down. The loft is sealed before anything moves inside.
Weeks 5–7
Insulation and first fix
Walls and roof are insulated, stud partitions go up, pipes and cables are run. Building control inspects at this stage before anything is boarded up.
Week 8
Staircase
The landing ceiling is opened and the new loft stair fitted. Fire doors to the floor below are part of this phase. Expect two or three days of dust on the landing.
Weeks 9–11
Plaster, tiling, second fix
Boarding and skim plaster, then tiling and fitting of the en-suite (if included), sockets, lights, and joinery.
Week 12–14
Sign-off and handover
Final building control inspection, snagging walkthrough, scaffold down, full clean. You receive your completion certificate, warranty documents, and as-built drawings.
Your named project manager
Every LINX build has one point of contact. Weekly written updates, clean working practice, and all materials lifted via scaffold — not through your living room.
What Our Customers Say
Real reviews from verified Google customers
125 Google reviews
“A first-class experience from start to finish! Christian arrived promptly and provided a highly detailed, comprehensive quote. The team stuck to the timeline strictly, finishing exactly on time — often staying into the early evening to push the project forward. Finding an honest and professional builder is never easy, but LINX truly excelled in every department.”
“The quality of workmanship was outstanding, attention to detail was second to none, and everything was completed to a very high standard. The team was respectful, punctual, and kept the work area clean and organised throughout. A truly stress free experience from start to finish.”
“We recently completed a wraparound extension and couldn't be happier with the results. A special thank you to Ryan and Gary who went above and beyond throughout the entire project. The quality of workmanship is outstanding — the transformation of our home has exceeded all expectations. We've had so many compliments already!”
“A first-class experience from start to finish! Christian arrived promptly and provided a highly detailed, comprehensive quote. The team stuck to the timeline strictly, finishing exactly on time — often staying into the early evening to push the project forward. Finding an honest and professional builder is never easy, but LINX truly excelled in every department.”
“The quality of workmanship was outstanding, attention to detail was second to none, and everything was completed to a very high standard. The team was respectful, punctual, and kept the work area clean and organised throughout. A truly stress free experience from start to finish.”
“We recently completed a wraparound extension and couldn't be happier with the results. A special thank you to Ryan and Gary who went above and beyond throughout the entire project. The quality of workmanship is outstanding — the transformation of our home has exceeded all expectations. We've had so many compliments already!”
“From the initial consultation through to completion, the team was professional, dependable, and easy to work with. The standard of work was exceptional, with careful attention to detail and a clear focus on quality. The project was completed on schedule and the finished result exceeded my expectations.”
“LINX completed a full flat renovation for me in Forest Hill. I originally chose them because they offered the best quote, but what really stood out was the daily communication, flexibility, and quality of their work. I highly recommend this company.”
“The team was professional, easy to communicate with, and delivered high-quality work. The finish looks clean and modern, and they paid great attention to detail throughout. I'd definitely recommend them.”
“From the initial consultation through to completion, the team was professional, dependable, and easy to work with. The standard of work was exceptional, with careful attention to detail and a clear focus on quality. The project was completed on schedule and the finished result exceeded my expectations.”
“LINX completed a full flat renovation for me in Forest Hill. I originally chose them because they offered the best quote, but what really stood out was the daily communication, flexibility, and quality of their work. I highly recommend this company.”
“The team was professional, easy to communicate with, and delivered high-quality work. The finish looks clean and modern, and they paid great attention to detail throughout. I'd definitely recommend them.”
A hip-to-gable conversion rebuilds the sloping triangular end of a hipped roof — the "hip" — into a vertical wall called a gable. The result is a straight wall at the end of the house rather than a slope, which opens the full width of the loft and can add up to 30m² of new floor area. It is frequently combined with a rear dormer to maximise usable space.
The conversion requires a hipped roof — one with a sloping triangular end rather than a straight vertical wall. This rules out mid-terrace houses, which share both side walls and have no exposed hip end. Semi-detached houses can convert the non-party-wall side, end-terrace properties can convert the exposed side end, and detached houses can convert either or both hips.
Usually not. The same permitted development rules that govern rear dormers also allow hip-to-gable work, provided the new gable stays within the volume allowance (40m³ for end-terrace, 50m³ for semi-detached and detached), does not exceed the ridge height, and is finished in materials similar to the existing house. Conservation areas, Article 4 directions, and flats or maisonettes are excluded from permitted development rights, so a full planning application is needed in those cases.
Yes, and this is the most popular combination for semi-detached and end-terrace properties. The hip-to-gable opens the full width of the loft from side to side, while the rear dormer adds full standing height across the back. Together they can deliver a loft the size of a generous double bedroom with an en-suite — typically 25–40m² of usable floor area depending on the house. Both elements can often be done under a single permitted development scheme.
A standalone hip-to-gable adds around 10–15m² of new floor area, depending on the depth and pitch of the existing hip. Combined with a rear dormer, the total usable loft floor area typically reaches 25–40m². The visualiser on this page shows the before-and-after difference in roof shape.
A standalone hip-to-gable typically takes 10–12 weeks on site. When combined with a rear dormer the build runs 12–14 weeks, since both elements are usually tackled as one programme. The critical phase — rebuilding the hip end and opening the rear slope — is typically completed within the first four weeks, after which the work moves inside.
A standalone hip-to-gable starts from £50,000. When combined with a rear dormer — the most common configuration — the combined price starts from £65,000. What drives the cost up is the size of the house, structural complexity, internal fit-out (especially an en-suite), and the finish on the new gable cheek. Every quote we issue is fixed and fully itemised before you commit.
Get Started Today
Use our free property checker or speak directly with our team. We respond to all enquiries within one working day.